How to Build a DIY Dog Wheelchair for Front or Back Legs

Caring for a dog with mobility challenges can be both a heartwarming and demanding experience. Whether due to age, injury, or a congenital condition, dogs with limited mobility in their front or back legs often need a wheelchair to lead fulfilling lives.
While building a DIY dog wheelchair may seem like a resourceful and cost-effective solution, it’s crucial to weigh the pros and cons. This page covers them in detail, explains why precision matters, and why a professionally crafted option is often the wisest choice.
First, Understand Your Dog’s Mobility Needs
Dogs require wheelchairs for various reasons. Spinal injuries, degenerative diseases, or paralysis may limit a dog's ability to move independently.
Before considering any solution, consult a veterinarian to assess your dog’s specific needs, including the level of support required and any underlying medical conditions that a wheelchair must accommodate.
Front-Leg vs. Back-Leg Mobility Issues
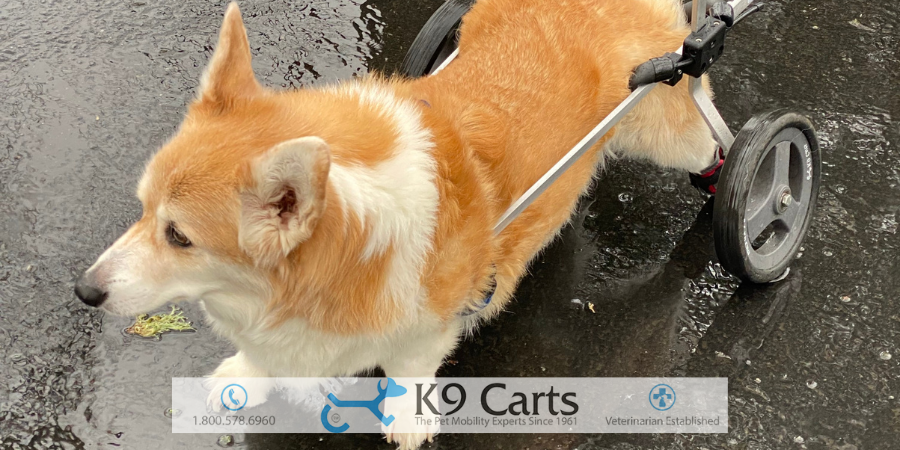
Wheelchairs differ significantly depending on whether they’re designed to support the front or back legs. A rear wheelchair supports hind legs while allowing the dog to use its front legs to pull the cart forward.
Conversely, a front-leg wheelchair provides support for the shoulders and chest, enabling the dog to push itself forward using the back legs.
Some conditions may even necessitate a full-support wheelchair for all four legs.
The Complexity of Building a DIY Dog Wheelchair
The concept of crafting a DIY dog wheelchair might seem straightforward, but executing it properly requires a thorough understanding of canine anatomy, engineering principles, and material science.
Attempting to build a wheelchair without adequate knowledge can result in an ill-fitting or unbalanced device that may do more harm than good.
Key Factors to Consider When Building a Dog Wheelchair
-
Precise Measurements:
- A wheelchair must be tailored to your dog’s unique dimensions. This includes the height, width, and length of the dog, as well as specific measurements of their limbs, chest, and hips. Miscalculations can cause discomfort, restricted movement, or strain on unaffected parts of the body.
-
Material Selection:
- Lightweight materials, such as aluminum or durable plastic, are essential to avoid overburdening the dog. Heavier materials can cause fatigue and exacerbate mobility issues.
-
Balance and Stability:
- The wheelchair’s design must distribute weight evenly to relieve stress on the spine and unaffected limbs. Poorly engineered wheelchairs can create imbalances that lead to further injuries.
-
Adjustability:
- Dogs grow, age, and change in condition. A wheelchair should adapt to these changes. DIY designs often lack the necessary adjustability to accommodate a dog’s evolving needs.
-
Ergonomics and Safety:
- The design must ensure that your dog’s posture remains natural and stress-free. Poorly aligned supports can cause abrasions, pressure sores, or joint stress.
Challenges of Building a DIY Dog Wheelchair
Even with detailed guides, building a dog wheelchair involves significant trial and error. This can be distressing for your dog and potentially worsen their condition.
Additionally, sourcing suitable materials and tools may be time-consuming and expensive, negating the perceived cost benefits of a DIY approach.
Why Custom-Built Dog Wheelchairs Are Superior
Custom-built dog wheelchairs from experts like K9 Carts provide unmatched advantages. These wheelchairs are designed with decades of expertise, ensuring they meet the highest standards of functionality, comfort, and safety.
1. Precision Engineering for Perfect Fit
K9 Carts customizes each wheelchair to the exact specifications of your dog. Every detail, from the height of the wheels to the angle of support, is calibrated to provide optimal mobility without compromising your dog’s comfort or health.
2. Lightweight and Durable Materials
Using high-quality, lightweight materials ensures the wheelchair is easy for your dog to maneuver while maintaining durability. These materials are carefully selected to avoid unnecessary strain and to withstand regular use.
3. Expertly Tested Designs
With over 60 years of experience, K9 Carts has refined its designs to address common issues found in poorly made or DIY wheelchairs. Their products balance functionality and ergonomics, ensuring that your dog can move freely and comfortably without risking further injury.
4. Long-Term Value and Support
Investing in a custom-built wheelchair means you’re not just purchasing a device; you’re gaining access to a team of experts dedicated to your dog’s well-being. K9 Carts offers ongoing support to ensure that the wheelchair continues to meet your dog’s needs as they change over time.
How to Build a DIY Dog Wheelchair
If you still wish to explore the process of building a dog wheelchair, understanding the fundamental steps is important.
While the following guide provides a basic framework, remember that constructing a functional wheelchair requires precision, suitable materials, and a keen understanding of your dog’s anatomy.
Any errors in the design or assembly could lead to discomfort or harm for your pet.
Step 1: Gather the Necessary Materials
- Frame Material: Use lightweight and durable materials such as aluminum tubing or PVC pipes. These ensure the wheelchair is sturdy yet easy for your dog to maneuver.
- Wheels: Select wheels of an appropriate size based on your dog’s height and intended mobility terrain. For small dogs, stroller or caster wheels may suffice, while larger dogs may require bike wheels.
- Harness or Sling: A comfortable harness or sling is needed to secure your dog in the wheelchair while supporting their body weight.
- Connectors and Fasteners: Use T-joints, elbow connectors, and screws to secure the frame components.
- Padding and Straps: Foam padding and adjustable straps will improve comfort and prevent chafing or sores.
- Tools: A saw, measuring tape, drill, and screws are typically required for assembly.
Step 2: Measure Your Dog
Precise measurements are critical. Record the following dimensions:
- Height: Measure from the floor to the dog’s belly.
- Width: Measure the widest part of your dog’s body.
- Length: Measure from the chest to the tail base.
- Limb Height: Measure the height of the affected limbs.
These measurements will inform the dimensions of the frame and placement of supports.
Step 3: Construct the Frame
- Cut the aluminum tubing or PVC pipes to size based on your dog’s measurements.
- Assemble the frame using T-joints and elbow connectors to create a rectangular shape. Ensure the frame height allows your dog’s paws to touch the ground (if needed) for propulsion or balance.
Step 4: Attach the Wheels
- Install the wheels at the rear (for back-leg support) or front (for front-leg support) of the frame.
- Use axle rods or bolts to secure the wheels to the frame.
- Ensure the wheels rotate freely and are aligned to maintain balance.
Step 5: Install the Harness or Sling
- Attach the harness or sling to the frame where it will comfortably support your dog’s body weight.
- Position the harness so that it aligns with your dog’s natural posture, avoiding pressure on sensitive areas.
Step 6: Add Padding and Straps
- Apply foam padding to areas where the frame contacts your dog’s body to prevent irritation.
- Use adjustable straps to secure your dog in the wheelchair. Ensure the straps are snug but not too tight.
Step 7: Test and Adjust
- Place your dog in the wheelchair and observe their movement. Look for signs of discomfort, instability, or restricted motion.
- Make necessary adjustments to the frame, wheels, or straps to improve fit and comfort.
Challenges to Expect During Construction
Building a functional wheelchair involves significant trial and error. Misaligned components, inadequate weight distribution, or discomfort may require extensive modifications. Additionally, sourcing quality materials and ensuring precision can be time-intensive and costly.
Why Custom-Built Solutions Are Still the Best Choice
Even when following these steps carefully, the results of a DIY wheelchair may fall short of what your dog needs for comfort, safety, and mobility.
Custom-built wheelchairs from experts like K9 Carts eliminate guesswork and offer professional-grade solutions designed specifically for your dog. By investing in a custom option, you save time, reduce stress, and ensure your dog receives the highest level of care.
Giving Your Dog the Gift of Mobility
Your dog’s happiness and health are worth the investment in a reliable, high-quality wheelchair.
K9 Carts has helped countless dogs regain their mobility, independence, and joy with expertly crafted wheelchairs. By choosing a trusted solution, you can ensure your dog remains comfortable and active, enjoying life to its fullest.
When faced with the question of whether to build or buy a dog wheelchair, the answer often comes down to expertise, precision, and care. With K9 Carts, you’re not just giving your dog a wheelchair; you’re providing a tool that enhances their quality of life.
Let the professionals handle the complexities, so you can focus on what matters most - spending precious moments with your beloved companion.


